

How To Make A Flower Necklace With Beads
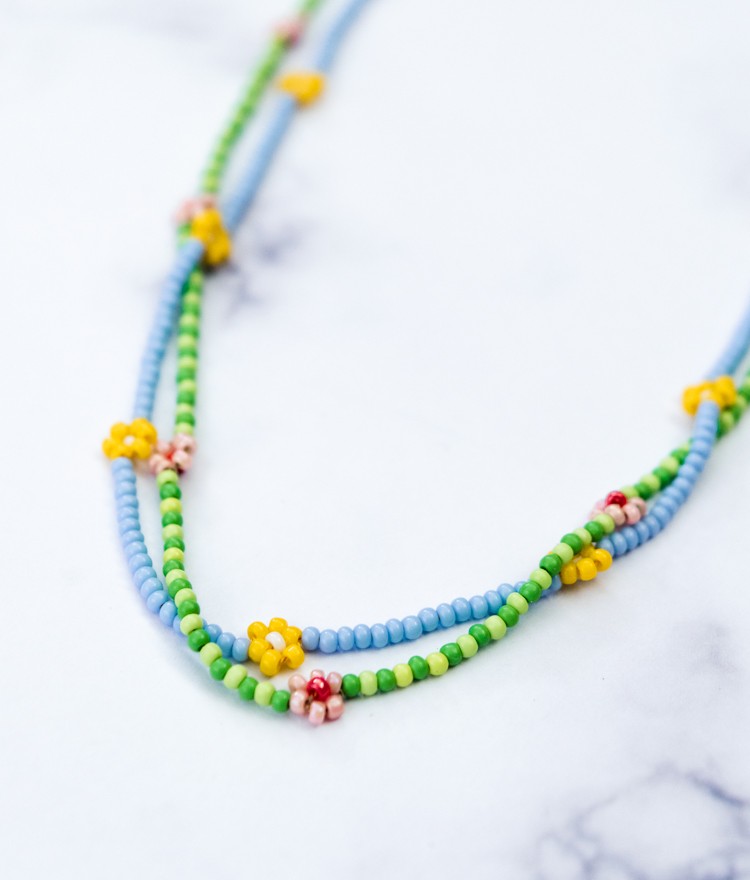
These daisy necklaces made from seed beads spark and so much joy for me, and they are then piece of cake to make yourself. Follow this step-past-pace daisy necklace DIY to learn how. Once you get the hang of it, you can actually go crazy with all the color possibilities!
Daisies cheer me upwardly every time I see them. If they brand you happy too, make a necklace for yourself or someone you dear and bring a petty more sunshine into the world.
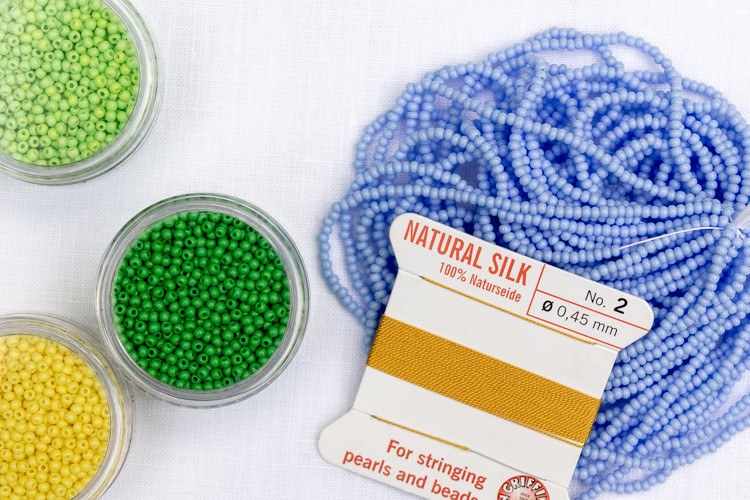
Supplies
- Size 11/0 seed beads in at least 3 colors (base, petal, flower center)
- No. 2 (.45mm) silk or nylon string with needle (pick a color that is close to the color of your petals)
- large eye needle
- bead clips
- lobster clasp
- 2 clamshell crimp beads
- 3 4mm gold jump rings
- chain nose pliers
- aptitude chain olfactory organ pliers
- awl
- ruler
Time needed:one hour and 30 minutes.
Daisy Necklace DIY Instructions
- Plan out your necklace
Decide how long you desire your necklace to exist, and brand sure y'all have enough beads. My necklace is xviii inches (about xix with the clasp and jump band).
Also, figure out how long you want each section of beads to exist betwixt each of the flowers. Anywhere from half an inch to an inch and a half looks pretty good.
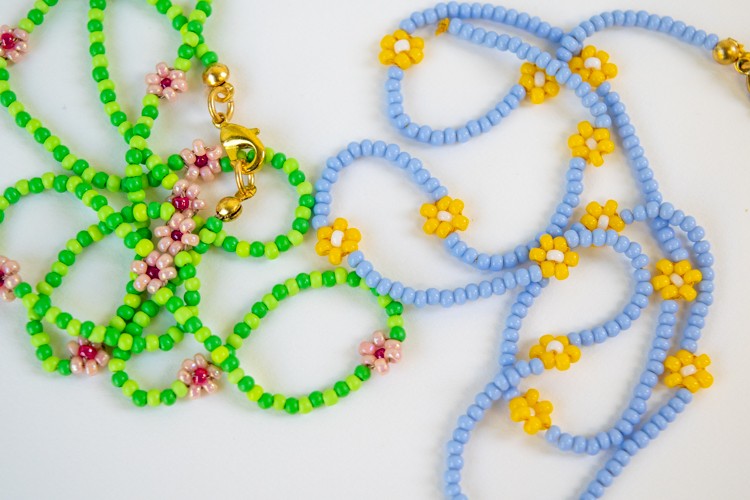
I accept to see it to make a decision so I usually merely start stringing beads and attempt out different lengths. My flowers are an inch apart in the blueish/white/yellow necklace, and an inch and a quarter apart in the green/pinkish/red one.
- Cut your cord
Unwind the cord cease without the needle, thread the cord through the beading needle, and test that you can thread each color of your beads onto the cord. Yous're going to accept to get through your petal beads twice to make the flowers, and then exam that out besides.
If you lot can't thread them, you're going to demand to use the attached needle, since the string won't need to exist doubled over in order to thread the needle. Cut a length of cord about 30 inches long, either with or without the needle.
- Start stringing the beads
Thread your cord through your needle. Then tie two surgeons' knots on top of each other at the stop without the needle. Slide a clamshell crimp bead onto your cord to cover the knot, and use your chain nose pliers to gently squeeze it closed around your knot. Now yous can offset stringing your base color beads.
It helps not to drink too much caffeine before you practise this, and to have good lighting. I like to take a ruler out too to cheque my measurements as I go forth.
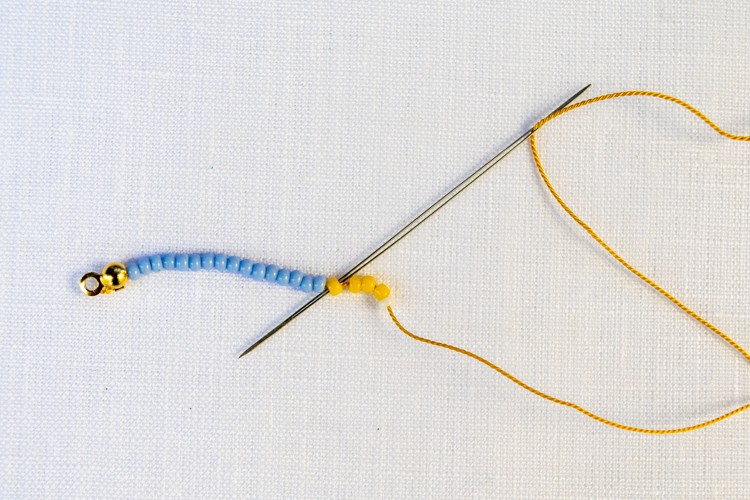
- How to brand the daisies — the first part
Once you have reached the spot for your first flower, thread four chaplet of your blossom petal colour onto the cord, and and so ane of the flower centre colour. Slide them down and then they are snug with the other chaplet, then slide your needle back through the first petal dewdrop and pull the cord snug.
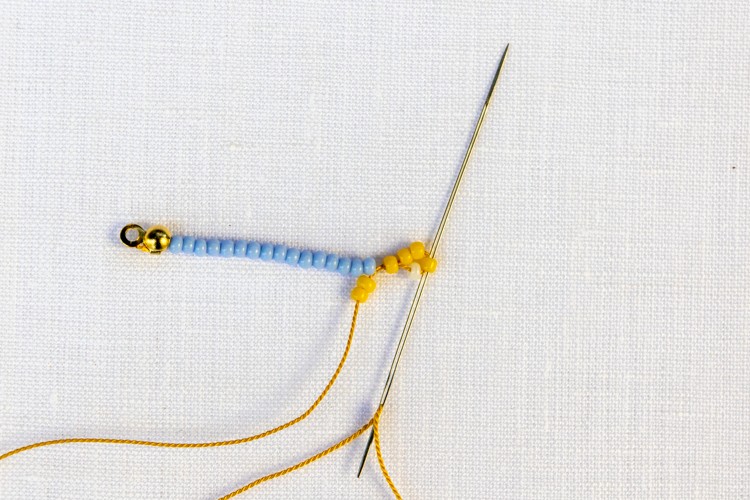
- How to make the daisies — the 2nd part
Slide some other two petal beads onto your cord. Now slide your needle upwardly through the bead merely before your blossom centre bead. Pull the cord snug. I like to spend a minute adjusting the chaplet and the tightness of the string to make sure my bloom looks skillful.
- Proceed adding chaplet
Keep stringing your beads, evenly spacing your flowers, until yous reach your desired necklace length. Then slide a clamshell crimp bead onto the cord.
- Tie your second knot and comprehend
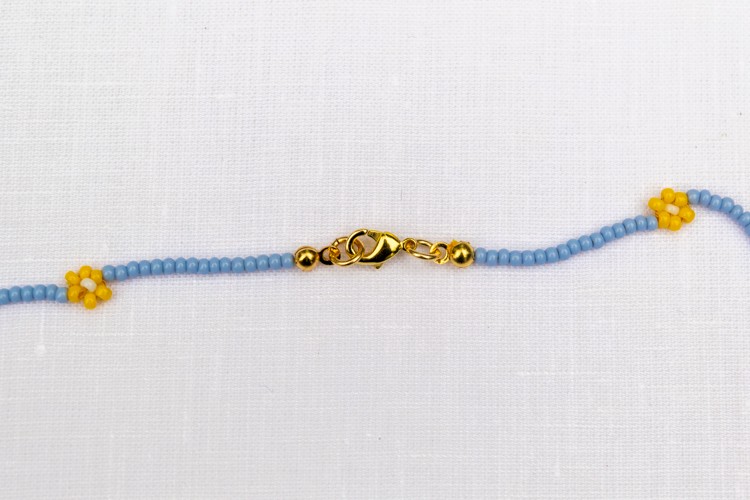
Cut the string then you have about 4 to v inches left by your clamshell. Using your awl and this technique (I love this site by the way — it's worth checking out Jessica's other videos and posts), tie 3 overhand knots on top of each other and snug with the clamshell. Make sure your beads are snug earlier yous tie your knots hither! Shut the clamshell with your concatenation olfactory organ pliers.
- Attach your lobster squeeze
Open a spring band with your chain olfactory organ pliers and your bent chain nose pliers by twisting it to the side. Adhere your lobster clasp to your clamshell with the jump ring, and close the jump band.
As I said, once you become the hang of information technology, it'due south difficult to stop making these. Playing with the color combinations is endless fun.
Please pin this mail service if yous like it, and delight bring together my electronic mail listing!
Looking for more DIY jewelry tutorials? Effort this Beaded Garnet Necklace!
Source: https://otherwiseamazing.com/make-a-daisy-chain-seed-bead-necklace/
0 Response to "How To Make A Flower Necklace With Beads"
Post a Comment